Documents, Practices and Gallery
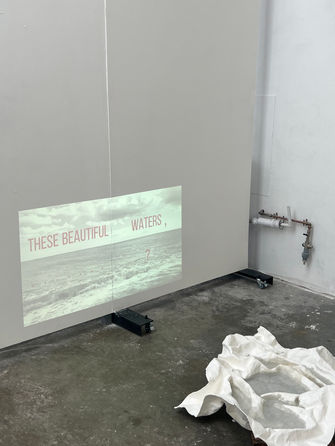
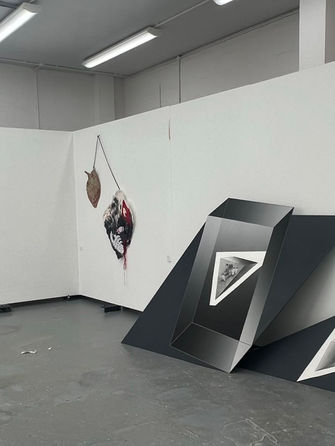
At this stage in Unit 3, I wanted to experiment more with engaging the audience in the open space, aiming to involve them in an immersive way within the work.
To achieve this, I used thin black masking tape to outline a larger open rectangular space on the wall, with perspective lines at the back to suggest a transparent area. The space is about human height, so it could frame people as they pass by, almost incidentally. The room itself is also rectangular, allowing people who pass through to be framed layer by layer into different spaces. Additionally, I added smaller rectangular spaces in various corners of the room and within the large rectangle to create an overall layered, stacked effect.
Unfortunately, the black masking tape didn’t have good adhesion and started falling off the wall after just a day. Electrical tape would have been a stickier option, but its elasticity made it difficult to apply straight lines on the wall. Therefore, I had to temporarily set this idea aside.


Practices of 'spaces' balck masking tape
Another idea I have is to further explore the social significance of space in my work—specifically, the idea of the collective, which doesn’t necessarily have to take on a regular or structured shape.
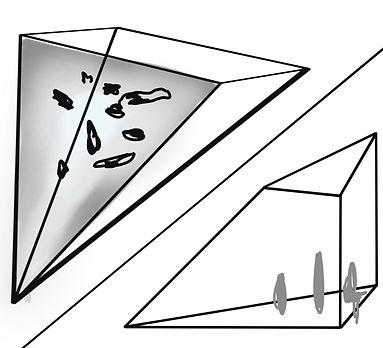
In my previous research, I found that many groups are formed by the fragmentation of a larger whole. This made me think of the tectonic shifts that occurred millions of years ago, causing the Australian, Antarctic, and Indian plates to separate and drift apart. From an aerial view of today’s world map, you can almost see how these plates, now divided by vast oceans, could be pieced back together like a puzzle. Inspired by this, I began to envision new spatial forms: I plan to take a single large panel as the base, then outline smaller regions within it to create new spaces before cutting the panel apart. This way, I can convey a sense of these sections originally being one unified whole.
Sketches for plate layout
As I aim to create a more immersive experience for the audience, I started considering the arrangement and layout of my work. Immersive pieces are often not in a 2D format; installation and spatial art are typically designed for audiences to enter or view from all sides. However, most of my work consists of flat, paper-based prints, and I don’t intend to create street-style, naked-eye 3D illusions. Instead, I am considering using the spatial qualities of the exhibition room itself to achieve a sense of immersion. For instance, a semi-enclosed space formed by the corner of two walls could help create this effect. I have sketched a few drafts to experiment with these ideas.


Sketches and layout for curating

Sketches of random group of people. 2x 21cm x 30cm
Sketches of random group of people.
2x 21cm x 30cm


Arrangement of milliput models with thin canvas board. 3x 21cm x 30cm
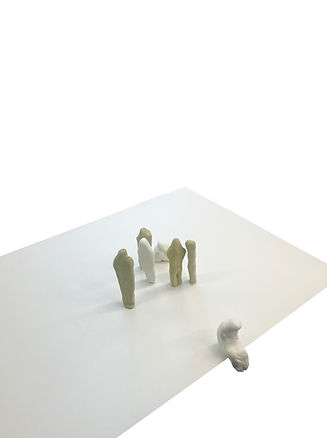
Based on the ideas above, I decided to incorporate new angles in creating the images that I hadn't used before. I wanted to achieve an effect where viewers seem to be circling around these figures through shifts in perspective. Previously, the figures in the images often faced the audience directly, breaking the fourth wall through expressions to engage in a dialogue. This time, however, I wanted to disrupt this straightforward approach by changing the viewing angle, placing the audience at a higher vantage point to look down on the figures in a more voyeuristic way. The figures no longer engage with the viewers; this shift in roles might evoke a different experience. The heightened perspective, with its sense of observation, allows for more room for contemplation.
Process

Digital image prepareation for film print (to expose on plate .

Exposed phoyopolymer plate 35cm x25cm

Printing with two plates on Hammemule paper 38cm x28cm

Figure details

Printing process


Printing with single plate on Hammemule paper 38cm x 28cm
Figure details


Plate before Printing
Plate after first print
Lumps appeared on plate
Problems encountered
These two plates were made during the summer when the sunlight was particularly strong. Since the coating on their surface is a photosensitive material, I initially thought that the grains on the surface would become more stable in the hot weather. However, that was not the case. After printing the first print, many irregular, very fine lumps appeared on the photopolymer plate. At first, I didn’t notice them, but they ended up greatly affecting the next print. Clusters of small black spots left marks on the paper resembling water stains, disrupting the original smooth gradient of the image.
Adjusting the pressure on the printing press didn’t help; the lumps seemed like air blisters formed from the detachment of the photosensitive coating due to excessive pressure, physically standing out from the flat surface of the plate. Here are some experiments and attempts I made to remove them:
-
Washing with vegetable oil and white spirit didn’t make them disappear.
-
Leaving the plates in the dark for a day would slightly reduce the lumps, but they reappeared after printing the first print.
-
Reducing the printing pressure didn’t prevent them, and due to the photopolymer’s properties, the paper couldn’t capture enough ink, causing the image to look too faint.
-
Heating the plate on a hotplate for 30 minutes to an hour made the small bubbles gradually subside, but traces of them still appeared on the second print.
-
A strong 5-minute curing session with the exposure machine could temporarily yield one or two almost blemish-free prints, but they would still reappear in later prints.
I spent three weeks trying these different defect-removal strategies, and even remade two identical plates to replace the originals. However, the new plates exhibited the same flaws. In the end, the results were disappointing, and these two plates became a source of frustration and anxiety, allowing me to print only one or two prints per week that month.
It has to be said that photopolymer plates are much less stable than traditional copper and zinc plates used in printmaking. Technician Brian mentioned that he also encountered similar defects one summer many years ago. We concluded that this type of plate might lose stability in hot and humid conditions.

Print detail affected by plate lumps

Print detail affected by plate lumps 30cm x 20cm
About Ink:
When it comes to inking techniques, photopolymer plates are arguably the simplest to work with. Unlike traditional zinc or copper plates that are etched with acid, the particles washed away from photopolymer plates are finer and more delicate, almost invisible to the naked eye. This allows for virtually unlimited wiping, and the level of wiping can be adjusted based on the desired cleanliness of the image without risking over-wiping.
Since I aim for my images to appear very clean and orderly, I typically spend 20-40 minutes wiping a single inked plate. This means that the ink I prepare at the start of each day ends up sitting for quite a while. Although Brian mentioned that theoretically, this prepared ink should not dry out within a day or two, my year-long study and experimentation with this type of plate revealed that even a moderately overcast morning can leave tiny particles in the ink by the time it’s reapplied to the plate. These small particles don’t affect zinc plates much, but on photopolymer plates, they leave stubborn marks that are difficult to remove. This then doubles the time required for wiping the ink in the next session.
Therefore, in the process of creating this type of print, it’s best to cover the freshly mixed ink immediately with cling film or tracing paper to protect it from subtle environmental effects.


Printing with multiple sheets of paper by one plate 4x 21cm x 30cm
I also tried printing a single plate across multiple sheets of paper, so that each sheet would display only a part of the image. My goal was to create a sense of a unified whole being broken apart, as an experiment with the concept behind my theme. However, perhaps because the sharp triangular shapes were divided by rectangular sheets, their inherent sharpness was lost, influenced by the rectangle’s boundaries, so the final result didn’t quite match my vision. When divided, the lines of these two plates ended up clashing with the straight edges of the paper, disrupting the original rhythm.
Maybe a larger, more irregular image could achieve the effect I imagined, such as dividing a smooth curved space with rectangular sheets, or having a regular rectangular space intersected by irregular curves. This might yield better results.

Image of empty space Digital

Image of empty space Digital

Inkjet printing on somerset paper 1.5m x 0.8m
Based on my previous idea of creating a more immersive experience for the audience, I created some images with open spaces and printed these on a digital printer. The print is over a meter tall, about the height of a person, and follows the characteristics of my previous work, using a texture that mimics printmaking as the background, with smooth contours and edges. I chose coated Somerset paper to enhance the texture, intending to make this piece part of the exhibition setup.
Curating and Set up

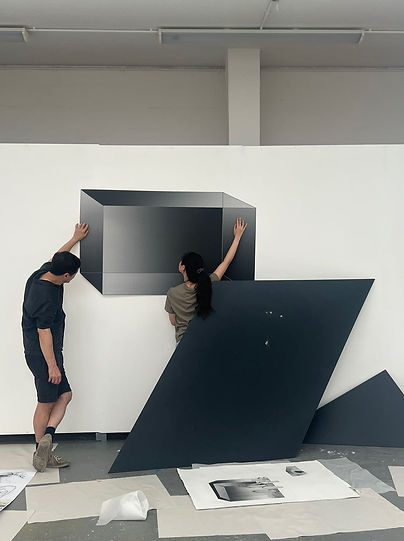

Proceess of displaying elements for year show.
When planning the installation for the year show, I modified the diamond-shaped background I used in Unit 2, changing it from a flat piece hanging on the wall to a standing structure on the floor, supported by two triangular parts cut from the same material. These triangular pieces support each other at a slanted angle. In the previous unit, I mentioned that this background represents society at large in my project. The semi-open structure built from parts cut from the same material also symbolizes the integration of the audience and the venue into the piece, inviting passersby to become part of this "society."
With help from my friends and tutors, I experimented by combining the printed empty boxes with this constructed background, aiming to find the most suitable arrangement for them.


Displaying the inkjet printing to find a perfect vision angle
Before cutting out this empty space, I hadn’t realized that from a certain angle, it appears quite three-dimensional. While arranging it, we discovered this effect and aimed to use it to find the most suitable angle for display.


Try to combine the two major elements together.
Balancing and Combining:
In the end, we decided to combine the two elements, taking advantage of the alignment of their lines for a cohesive merge. Since this exhibition is a collective show for the entire fine art department, merging the two pieces creates a stronger sense of unity in the work, rather than having two large color blocks connected across different planes. This way, the atmosphere of the piece won’t clash with that of other works when viewed by the audience.

Repainted and assembled wooden board background 2.5m x 1,3m

Some prints used to experiment with the curation effect.

The details of the supports used to hold the entire wooden board upright.

Some prints used to experiment with the curation effect.
After arranging and assembling the main background, I began experimenting with how to incorporate my prints to make the entire installation cohesive and visually appealing.
As mentioned above, placing the digital print on the diamond-shaped wooden board was guided by the alignment of their fluid lines and overall direction. I then arranged the other prints to harmonize with these directional flows.
For instance, the center print’s line of gravity aligns with that of the large cube, and the sharpest edge of the bottom-right print mirrors the edge of the large parallelogram board. The two smaller prints floating in the upper right expand the space, extending towards the white wall. This allows the heavier tones below to breathe and directs the upper right corner of the parallelogram board toward the space created by the smaller prints, avoiding any encroachment on neighboring works.
This approach broadens the visual space, allowing the white wall to become part of the artwork while also serving as a pause, marking a boundary with Roshail’s piece on the right.
In curating the exhibition, I felt a new expression of my theme emerge. The parallel and intersecting lines within the space resemble the groups in my theme—they are alike, parallel, intertwined, colliding. People, too, are alike, parallel, intertwined, colliding. However much they change, there remains a likeness; however much they are alike, there remains a difference.


Curating process within overall directional motion line
Back of the installation
When using triangular supports to hold up the entire structure, I noticed that part of the support panel on the back was also empty. So, I attached a small print featuring a single figure to this area, creating the image of an individual isolated from the group. The figure curls up in the corner, holding itself tightly and looking away, which aligns with my exploration of isolation in this work. This addition also enriches the overall visual and conceptual depth of the entire installation.
Gallery


Crowds, us 4
Photopolymer Etching Print on Hammemule Paper
28cm x 30cm
Crowds, us 5
Photopolymer Etching Print on Hammemule Paper
28cm x24cm

Crowds, us 4 detail
Photopolymer Etching Print on Hammemule Paper
28cm x 30cm

Crowds, us 5 detail
Photopolymer Etching Print on Hammemule Paper
28cm x24cm
Postgraduate Fine Art Show
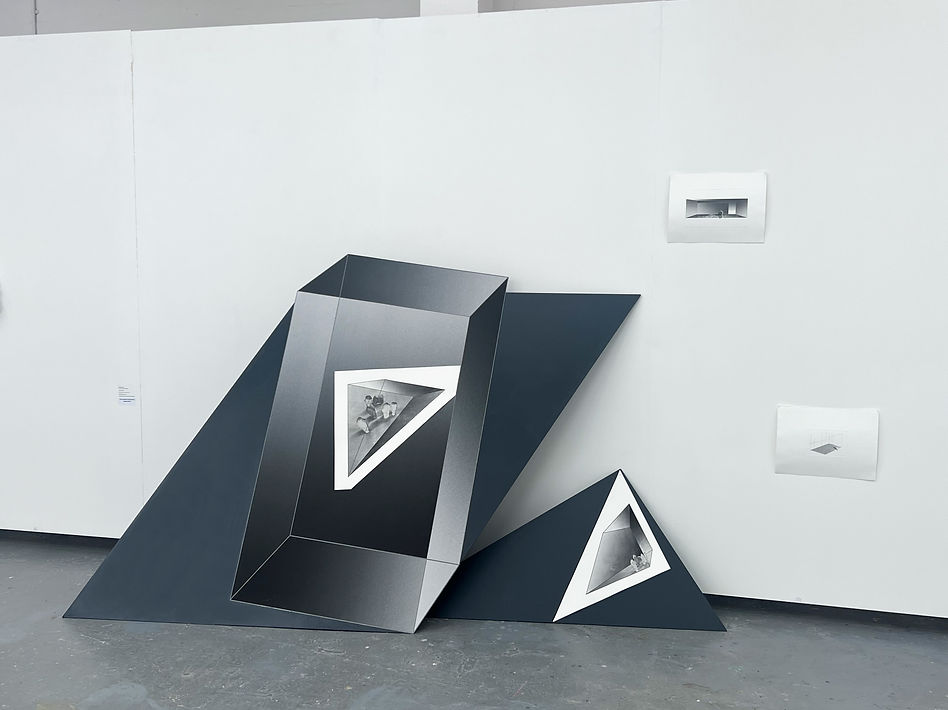
Crowds, us Wooden board, inkjet printing and photopolymer etching printing. 2.7m x 1.6m 2024

Crowds, us Background Detail

Crowds, us Detail

Crowds, us Detail 38cm x 28cm

Crowds, us Panoramic view

Crowds, us Detail

Crowds, us Detail 38cm x 28cm


